

My husband and I take an experimental approach to our gardening. If we get the slightest idea of something that would be neat to try, we try it.
Thankfully, we have a lot of garden space to work with. In addition to our own property, we are able to use our neighbour’s very large garden and have recently started helping our other neighbour convert some of their property into a garden. So, with all that space, we can try something on a whim.
Like wheat.
My mom had picked up a little bundle of wheat berries for us (wheat berries are what the wheat seed is called) and we decided we’d have a little patch of wheat. However, we didn’t have enough to fill the amount of space we had, so I picked up some more wheat berries from Bulk Barn (a bulk food store here in Canada).
We were thus committed to this project.
Planting wheat is remarkably easy. You just clear some earth and sprinkle wheat berries onto it.
To do this, I just had a fistful of berries, loosened my fingers a bit, and shook my hand, letting the berries slip between my fingers and land on the dirt.
From there, we watered regularly. I did this in the summer of 2022 and we had a decent rainfall that year. It likely would have been fine with the intermittent rain, but since it was a small enough patch, I watered the wheat between rainfalls.
Maintaining wheat is easy. The wheat largely chokes out weeds, so it requires little to no work.
Before long we had a patch of knee-high wheat. Over the course of the summer it grew to about hip height.

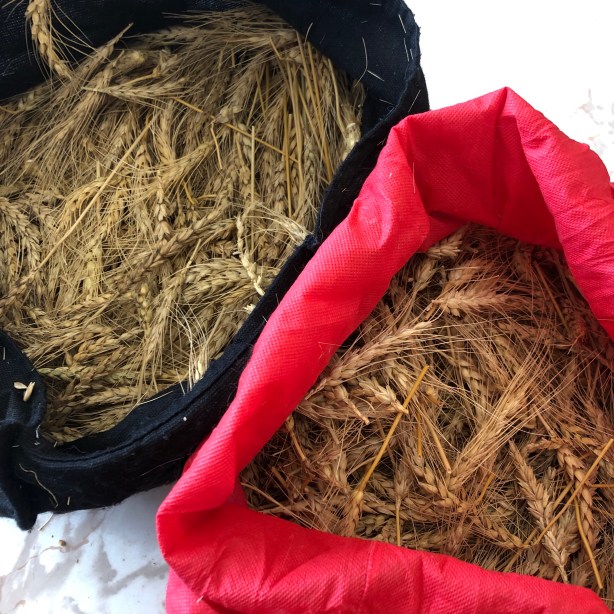
I did notice that we had two distinct types of wheat. One would have been what my mom gave me and the other would have been what we got from Bulk Barn.
As I proceed through this post, I’ll explain how I did it on my small scale operation here. If you have a much larger plot and want to grow a lot of wheat or if this is going to become a regular staple crop in your garden, I encourage you to do your Google research to find out how to do all this, because there are certainly better ways than what I did.
When late fall turns to early winter here in Winnipeg, the change happens in about 24 to 72 hours. Winter finally starts and everything needs to be harvested from the garden all at once.
For us that means all the half-ripened tomatoes, the potatoes, and the squash. And in 2022, that also meant the wheat.
My husband harvested the wheat by literally grabbing it by the handful and yanking it out of the ground. I came home from work one day to find our patio table absolutely laden with wheat. Most of it was ready for harvest—it had gone golden brown and was dry—but some of it was still too green.

With a pair of scissors I cut the heads of all the stalks of wheat, this took a super long time.
Anything that was too green was thrown out, but anything that looked dried or on its way to being dried went into a bag to be dealt with later.
My lesson here is to use fabric bags. I had one plastic bag of wheat, and since plastic is not breathable, it contained the moisture and went mouldy. The other two bags dried nicely, though, with everything turning golden brown.
If you have cats, I advise you to keep the bags out of their reach and/or tightly closed. both my cats repeatedly broke into the bags and pulled the wheat heads out to chew on them.
Normally I’d be okay with that because cats are curious and like to chew on plants. However, with wheat, as you can see in the photo above, there are strands that stick out. They are dry and stiff and pokey—I’ve scratched my hands on them. Something like that has the potential of getting stuck in a cat’s mouth or throat.
Anyway, that aside…
Let them sit and dry out completely. This can likely be accomplished in a few weeks, but for me the wheat became this thing I didn’t want to deal with and I ended up leaving it for seven months.
Now to process it and turn it into wheat!
Working in batches, put a bunch of wheat in an old pillowcase and absolutely bash the eff out of it with a rolling pin. If you know someone that needs to let out some aggression, invite them over.
Your goal here is to break the wheat berries out of their papery shells (the chaff).
In the photo, you can see I used a reusable shopping bag—that was the wrong choice. It had so much pokey, scrapey chaff stuck in the fibres that I had to throw the bags out.

When you start pulling it out of the bag or pillowcase, it should look like this…

Scoop it into a big bowl.
Since I was working with a smallish batch of wheat, I took the time to break up heads of wheat by hand if they survived the rolling pin bashing. I also dug my hands into the bowl several times and squeezed the wheat to break up some more and encourage the berries to separate from the chaff.
I recommend wearing rubber gloves or gardening gloves while doing this. The sharp, brittle chaff can easily cut like a papercut. At one point I even got some embedded under my fingernail.
Eventually you’ll have a bowl that looks like this…

Grab that bowl and a second bowl, and head outside. Hopefully there’s a gentle breeze or a mild wind. If not, you might need to bring a fan out with you.
Pour the wheat and chaff from one bowl to another several times. The breeze will blow away the super-light chaff, leaving just berries (and still some chaff) in the bowls.

When I eventually do up a post about harvesting mustard seeds, it’s the same process.
Eventually you’ll have a bowl of mostly wheat berries. I then handpicked out the last of the chaff.
To do this fairly easily, I scooped a handful onto a plate, picked out the chaff, and dumped the berries into a new bowl. Doing this several times soon leads to a bowl of only wheat berries.

Now we need to turn the wheat berries into flour.
You can buy a small grain mill if this becomes a regular crop for you, but there are alternatives.
You could use a coffee grinder (but be sure to fully clean it before using it again for coffee!) or, like me, you could use a high power bullet blender. Working in batches, I used the blender to grind it into somewhat-chunky flour.

I didn’t get it super fine because the blender started overheating. But I got it decently ground. When I use some of this flour, I’ll likely run it through the coffee grinder to see if I can get it finer.
I’m hesitant to use it for bread and general baking because that usually relies on a certain consistency of flour for rising and the other aspects of baking. I’m sure it would be fine for this, but with a limited amount of flour I don’t want to use it for bread and then have it not turn out.
I would, however, use it for recipes that don’t involve rising. For example, it would work great with Irish potato bread since the flour basically just holds the potato together, or as part of the crumble topping on apple crumble, or if you dredge battered fish in flour.
This was definitely an interesting and worthwhile gardening experiment. It’s not likely one I’d try again, but if you have a good patch for wheat, invest in a few tools and equipment to aid the process, and experiment with the best ways to use your flour, this could be a great crop for you.