

I try to buy food in smaller quantities because we hate food waste and we also don’t like having to overeat something just to avoid throwing it out.
But a sale is a sale.
Blueberries were dirt cheap a few weeks ago and my husband eats them. I decided to buy more than double his normal amount and I intended to experiment with preserving them via fermentation.
Fermentation typically preserves fruits and vegetables by allowing good bacteria to thrive and destroying bad bacteria. The good bacteria is typically probiotic bacteria, so in addition to being good for food preservation, it’s also good for your gut.
There are apparently two ways to ferment blueberries—one is with 2% salt by weight and the other is with a sugar brine. For this, I decided to go with the salt process, and I’ll try the sugar brine next time blueberries are on sale (update: here it is).

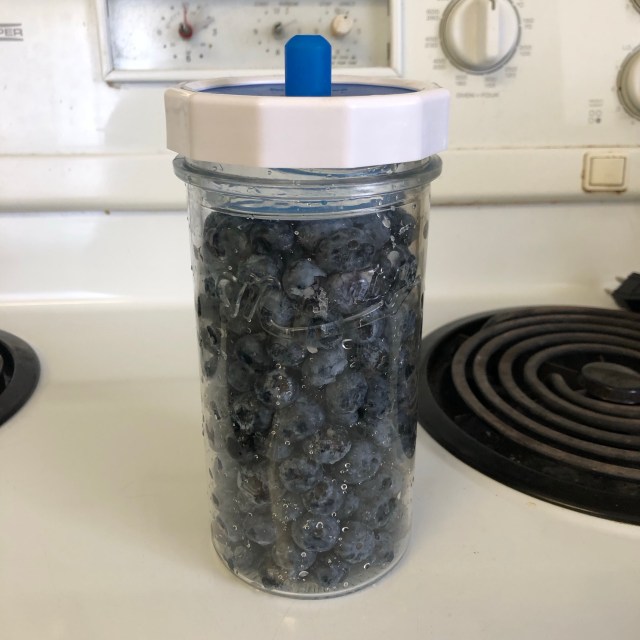
A couple years ago I received this handy fermentation kit for Christmas. It comes with a large glass jar, a glass fermentation weight, and an airlock lid.
While this specific recipe doesn’t include submerging blueberries in liquid, most fermentation recipes do, so a fermentation weight helps keep the food below the liquid level. The fermentation process creates gas, so the airlock lid lets the gas escape without worrying about pressure building up.
If you don’t have a fermentation kit, you can easily construct a makeshift one.
You’ll want:
- A large glass jar, preferably with a wide mouth.
- Something to act as a weight; this could be a Ziploc bag with water in it, or a smaller jar that can fit inside the fermentation jar, or if you’re using a really large jar with a really large mouth, you might even be able to fit a small plate in there.
- In the absence of an airlock lid, you can just use a normal lid, but you’ll want to “burp” it regularly, which means opening it to allow the gas to escape. In this recipe, you can have the lid slightly loose so gas can escape on its own, or you can burp it every twelve hours or so.
As far as fermentation projects go, and I haven’t done a whole lot but I’ve done some, fermenting blueberries is reasonably simple. You need a weight for the blueberries and then you calculate 2% of this weight to figure out how much salt to add.


Mix it all in a bowl, transfer to your fermentation jar, and you just let it sit for a few days.
It took us about four days until we felt they were fermented. You can see in the photos that the level of the weight sunk a bit, which I think was caused by blueberry juice being expressed.

The recipes I looked up all said something along the lines of tasting it daily until it’s ready…but never really defined how you determine if it’s ready. It takes three to seven days, so I would say that it’s reasonably safe to assume that anytime after three days, if it’s tasting reasonably good, it’s likely safe to call it ready. By that time, the beneficial bacteria will have already taken over and gotten a good start at doing their work of preserving the blueberries—in other words, if it’s not perfectly fermented, it’s likely fermented enough to get the preservation effect that we’re after. If you find you enjoy fermented blueberries, you’ll develop a skill over time of determining by taste if the blueberries are ready.
If you used a Ziploc bag with water as your weight, you may find some scuzzy growth on there. Before I got my fermentation kit and I was fermenting tomatoes, I found this to be the case. As long as the blueberries look and smell fine, simply clean off the bag and reuse it.
If at any point there is fuzzy mould growth on the berries or if it ever smells or tastes like something’s gone wrong, dispose the berries and start over. The old adage of “when in doubt, throw it out” holds true here.
When the berries are ready, simply remove the weight, seal the jar, and move the blueberries to the fridge. For me, that meant transferring the blueberries to a new jar so my fermenting kit isn’t taken up with storing blueberries.

One of the byproducts of this form of fermentation is acetic acid, or vinegar. So the final result is a little bit sour. Understandably, the final result is also a little bit salty from, well, all the salt. It should also be a bit sweet. It’s an interesting mix of flavours. They’re probably best eaten on top of oatmeal or mixed in a smoothie where some of the “unique” aspects of the taste can be masked by the other ingredients.
My husband isn’t really a fan of blueberries preserved like this because he likes to eat the blueberries straight and that sour-salty tang isn’t his thing.
When I was researching this, I came across a second version of fermenting blueberries that uses a sugar brine as well as some kombucha, or water kefir, or whey. I brew both kombucha and water kefir, so I’m eager to try this alternative method. Of the two of them, I’m likely going to try the kefir version because kombucha can taste a bit vinegary, but with my extremely limited water kefir experience, there’s no vinegary taste there. Watch for that recipe to appear here in coming months. (Update: here it is.)

Lacto-Fermented Blueberries (2% Salt Method)
Ingredients
Equipment
Method
- Rinse and dry blueberries.
- Place blueberries in a bowl and weigh them. (Be sure to hit the "tare" or "zero" button before adding the blueberries to the bowl so you are weighing only the blueberries.)
- Calculate 2% of this weight and add that amount of salt. (For example, if you have 800g of blueberries, use a calculator to do 800 x 0.02, to get 16g of sat.)
- Thoroughly mix the blueberries and salt. You can slightly crush the blueberries if you'd like.
- Transfer the blueberry and salt mixture to the fermentation vessel. With a spatula, scrape out any remaining salt in the bowl so it's all in the fermentation vessel.
- Cover with a fermentation weight. Close with a lid. Fermentation kits often have an airlock built into them; if you're using a regular lid, don't close it super tight so that built-up gas can escape.
- Taste the blueberries daily until they've reached an appropriate level of fermentation for your taste (see note below); this should take three to seven days, depending on the temperature. When fermented, store the jar in the fridge. Blueberries should remain in good condition for several weeks.