When the tomatoes first start ripening in the garden, it’s a time of joy. Nothing beats a fresh tomato!
But a few weeks later when they all start ripening, it becomes a time of great distress—because how on earth am I going to use up all these tomatoes???

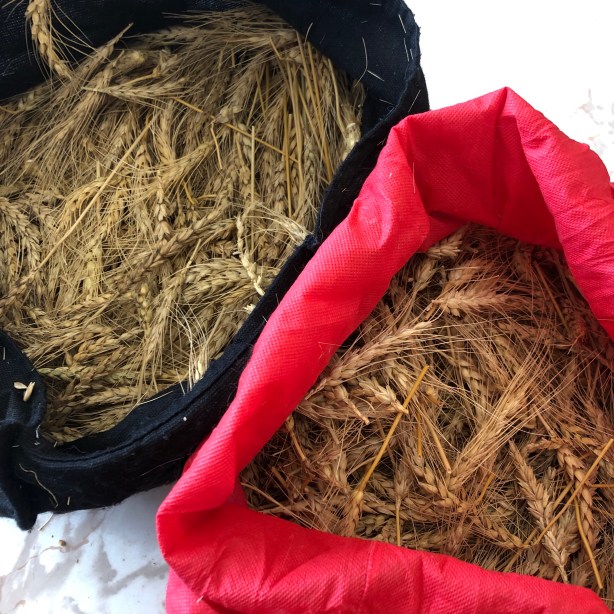
We have a tomato problem.
Two years ago, we had a decent amount of tomatoes and I was able to preserve everything and we enjoyed it throughout the year.
Last year, I got in a bit of a panic that we wouldn’t have enough tomatoes, so I bought extra plants. While I was doing this, our neighbour whose passion seems to be growing tomato seedlings for our shared garden, brought out dozens of tomato plants for us to have. We ended up with 49 tomato plants last year.
When the first frost hit in early October 2022, we panicked and harvested all the remaining tomatoes. Before this frost-harvest, I was already overwhelmed with tomatoes—there were just too many! But once that emergency harvest happened, our kitchen was filled with crates and crates and crates of tomatoes. I couldn’t go through them fast enough, so some started rotting and our kitchen was filled with fruit flies. We ended up throwing out hundreds of tomatoes, if not thousands. We swore to never repeat that.
When we started the garden this year, we decided to limit our tomato production, so we only bought a few plants. And then our neighbour brought out the 40—yes, 40—that he’d grown in his house. We suddenly had somewhere around 60 plants. We gave some away, but planted most of them in our garden.
So… what does one do with a million tomatoes?
One of the easiest answers is pasta sauce.
There are a million pasta sauce recipes out there—some safe for canning and some not. Some take a lot of work, and some are fairly easy.
Last year, I stumbled across a cherry tomato pasta sauce recipe (as we had a dozen cherry tomato plants last year) and it quickly became my go-to pasta sauce recipe because of how darn easy it is. It’s also highly adaptable to what you have on hand and how you want to do it. Further, it works perfect as a fresh sauce, a frozen sauce, or a canned sauce.
The best part is that you don’t have to peel the tomatoes—a laborious step in nearly every other pasta sauce canning recipe! Nor is a food mill required at any point. Tomato peels are safe for canning, there are recipes that use unpeeled tomatoes after all, but they’re usually peeled in the case of pasta sauce because they can sometimes turn bitter in the canning process. I’ve never noticed any bitterness with this recipe, so I’m never going back to one where you have to peel them.
Step One: Tomatoes
The recipe I was following was for cherry tomatoes, but a little note said that it was good for all types of tomatoes, but you might want to chop them up if they’re too large.
When I did the batch of sauce where I took photos for this post, I had an abundance of plum tomatoes. Since they’re not much bigger than cherry tomatoes, I left them whole for this recipe.
The first step is simple—wash and de-stem the tomatoes. If they’re large, cut them into chunks. (And if they have a tough core, de-core them as well.)
Then just dump it all in your slow cooker.
(If you don’t have a slow cooker or don’t like using it, I’ve got oven adaptations in the recipe notes at the bottom of this page.)

I have a 12 cup slow cooker, but the beauty of this recipe is that it can be adjusted to any amount. In terms of canning safety, if you choose to can it, we will be adding lemon juice directly to the jars before canning, so there’s no need to worry about acidity levels and how much acid to add to the slow cooker.
Step Two: Add Seasonings
This is rather vague. The recipe I based this off was rather vague too. I tend to be a cook that’s comfortable flying by the seat of my pants, but I know that’s not everyone’s style. (My mom panics if there aren’t super-specific quantities listed in a recipe.)
If you’re the super-specific quantities type, this works for an 8-cup batch:
- 1 Tbsp onion powder
- 1 Tbsp garlic powder
- 1 tsp dried oregano
- 1 tsp dried basil
- Salt and pepper to taste
If you have a 12-cup slow cooker like myself, filled to the brim, that would work out to 1.5 Tbsp onion and garlic and 1.5 tsp oregano and basil.
Nowadays, though, I just open the seasoning packets and dump in whatever looks good. You’ll see in the photo below that I used fresh garlic, which the original recipe indicated could be done and still be safe for canning. I generally prefer garlic powder, though, just to be on the extra safe side.

Step Three: Add Oil, Stir, and Cook
Add a healthy drizzle of olive oil or a neutral oil. (Have you seen the price of olive oil lately? I used much-cheaper canola oil.) Give it a good stir, if you can. Mine was a little too full to stir well, so I just kind of nudged things around a bit.
Put the lid on, set it to high, and let it cook for a few hours. If you prefer to set it on low and let it cook for half the day, that’s fine too.
What you’re looking for, regardless of how you cook it, is that the cherry or plum tomatoes have burst and their skins are wrinkled and the juice has been released. If you used big chopped up tomatoes, you’re similarly looking for them to look fully-cooked.
Step Four: Blend
If you have a handheld blender / stick blender, stick it in and blend it up. Make it nice and smooth.
If you’re using a food processor or a traditional blender, you can do this in batches, but be careful not to burn yourself as the sauce is quite hot.
(I forgot to take a picture of this stage.)
I’d suggest taking a taste because if you want to add more of any seasonings, now is the time to do so.
Step Five: Choose Your Storage Method
If you’re using this the same day or the next day, it can be refrigerated until ready to use.
If you’re freezing it, separate it into dinner-size servings in Ziplock bags or jars. The first year I did this, I froze it and it was wonderful when I thawed and reheated it. I normally don’t care for freezing, but this works just fine. If you’re using jars, try not to use jars that have a “shoulder”, and be sure to leave some headspace in case the sauce expands as it freezes. I don’t know how long things keep in the freezer, but the other day I found a frozen jar of sauce from last summer (so about a year ago), which I used it up and it was perfectly fine.
If you’re canning it, the instructions are fairly straight-forward:
- Add one tablespoon of lemon juice to each pint jar or two tablespoons to each quart jar. Do not use larger sizes. If you’re using a smaller size, do the appropriate ratio (like, a half-pint jar would require a half-tablespoon of lemon juice).
- Wipe the rim, then put on a two-part lid to fingertip-tight.
- Process in a boiling water bath for 35 minutes (adjusting for altitude if necessary).
- After processing, let sit in the canner for 5-10 minutes and then carefully remove jars from canner and place on a thick towel and let rest for 12-24 hours. After this time, check that the seals have popped, if any haven’t put them in the fridge and use within a few days (or just throw them in the freezer and have them whenever).

Step Six: Using Your Sauce
Use this how you would use any pasta sauce.
I like to make this a little more substantial when I make it part of dinner, so I usually fry up a little bit of ground beef, throw in some onions and mushrooms, and then add in the sauce. This goes perfect on top of pasta and served with your favourite cheese and a side of garlic bread.

Cherry Tomato Pasta Sauce
Ingredients
Equipment
Method
- Wash and de-stem tomatoes. If using tomatoes larger than cherry-sized, chop them into halves or quarters, depending on their size.
- Fill the slow cooker with tomatoes. Add a drizzle of olive oil, no more than a few tablespoons. Add in seasonings of choice (see notes for details). Stir.
- Cover and set slow cooker to high and let cook two and a half hours, or until everything looks fully cooked (the juice has released from the tomatoes, cherry tomatoes have popped, etc.). If you prefer to use the low setting, you'll want to let it cook for five hours.
- Using a hand blender / stick blender, blend everything until a smooth consistency. If using a regular blender or a food processor, process in batches until everything is a smooth consistency.
- If using fresh, serve on pasta or dish of choice. Sauce can be refrigerated for next-day use.If freezing, put pasta sauce in meal-size portions in ziplock bags or jars. If using jars, be sure to use jars that do not have "shoulders", and leave some headspace in case the sauce expands while freezing.If canning, add a tablespoon of lemon juice per pint jar or two tablespoons per quart jar. (Do not use a larger size. If using half-pints, add half a tablespoon of lemon juice.) Leave a half-inch of headspace. Wipe rims clean and put on two-part lids, fingertip tight. Process in a boiling water canner for 35 minutes (adjusting for altitude if necessary, see notes for a link). After processing, let sit in canner for 5-10 minutes, then remove jars from canner and place on a towel on a level surface and let sit for 12-24 hours. After this time, check that jars have sealed—unsealed jars should be refrigerated and used within a few days, sealed jars can be stored for up to a year and a half (after which point the flavour quality may degrade, but the safety remains indefinitely). See notes for more information on canning.